Introduction
Setting the initial MSP Partner Information on the Quickpass Dashboard is an integral part of the initial setup of the Environment.
Prerequisites
- Primary or Super Login for the Quickpass Tenant
Process
Select the Settings icon on the main Dashboard page
MSP Logo
The MSP Logo is used during communication with End Users and for emails sent for Alerts.
- The logo will be automatically resized if it is larger than 200px width x 95px high, however to achieve the best results it is recommended to use an image that size.
- PNG, JPG or JPEG formats will give the best results
- Click the Pencil Icon beside the default MSP Logo to add your company Logo to all future communications.
- Browse to the location that the image file exists and select it and click Open.
- A sample image will be displayed based upon the file selected.
- If this image looks distorted, please adjust the size of the image to match the above mentioned sizing and re-upload the logo file.
- Browse to the location that the image file exists and select it and click Open.
MSP Name and Time Zone
The MSP Name, Address, Phone number need to be confirmed. The name value is what will be displayed on the End User Communications.
The Time Zone value is important for communications to End Users and Alert notification times. Notifications are sent at 9 am based upon the Time Zone value.
- Click the Pencil icon beside the Company Name section.
- Adjust the information here to match your company details.
- Phone number value must be set to only the numeric values (no brackets or hyphens) and must be set to a valid phone number format for the country selected.
- Set the Time Zone for your physical location.
- Once all values are set, click the Save button to confirm these values.
Login Details and Plan Information
These values are set at the initial time of the account creation.
Each Login (technician) will see a different screen here with their personal information.
USER ID: Value is a GUID value that identifies the Login to our back end.
Install Token: This value is the same for all Logins and is what is used to identify the Tenant in our back end. This value can be regenerated when a technician leaves the company to ensure that the Agent cannot be install maliciously.
Plan information
This is where the future ability to manage the account billing details will be shown. If you need to make changes to your plan, please reach out to partnersuccess@cyberqp.com for assistance.
Global Password Rotation Options
This toggle will pause ALL automatic rotations regardless of the setting on the Customer's individual accounts. We recommend leaving this pause OFF (as shown in the screenshot) as the individual accounts can be set to Automatically rotate or not.
Just-In-Time Accounts
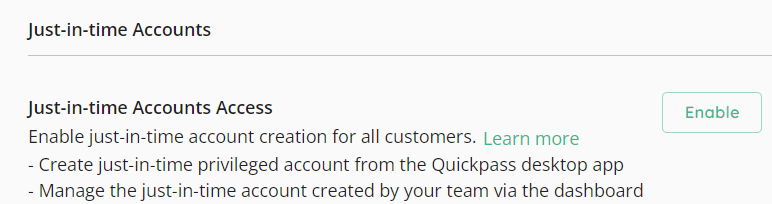
By Default, this options is not enabled. To find out more about what Just-In-Time Accounts are and how to properly use them, please take a look at these KB Articles explaining their usage.
https://support.getquickpass.com/hc/en-us/articles/14686543844375-Answering-Just-In-Time-FAQ
Self-Serve Password Reset
This toggle will allow Tenants that have the QDesk package to Enable Self-Serve and Notifications GLOBALLY for all of their customers. This is a legacy setting, so our recommendation is to leave this toggle ON (as shown in the screenshot) as each individual End User account can now be configured to allow the Self-Serve. With this toggle OFF (opposite of what is shown in the screenshot), regardless of the setting on the Customer End User account page, Self-Serve will NOT be allowed and End Users will not get the Password Expiration and Lock Out notifications.
Default Language
This option allows the Tenant to set the language for Notifications (Password expiration and Lock out) to be sent to ALL Customer's End Users in a specific language. This does NOT change the Dashboard for the Tenant to be changed to a different language.
Display Options
This is a per login setting that allows you to show the Dashboard in either "Light (Toggle off - White and Green)" or "Dark (Toggle On - Black and Green)" mode.
Comments
0 comments
Please sign in to leave a comment.